In today’s article, we’ll dive into using the command-line tool modbus-cli to interact with a PLC (OpenPLC) running inside LabShock — a popular open-source developed by Zakhar Bernhardt. While LabShock provides a friendly browser-based GUI (Pentest Fury > Modbus section), our goal here is to get comfortable with CLI tools that you can use in the real world, beyond lab environments.
Let’s get started by setting everything up and walking through how to read and write Modbus coils using modbus-cli.
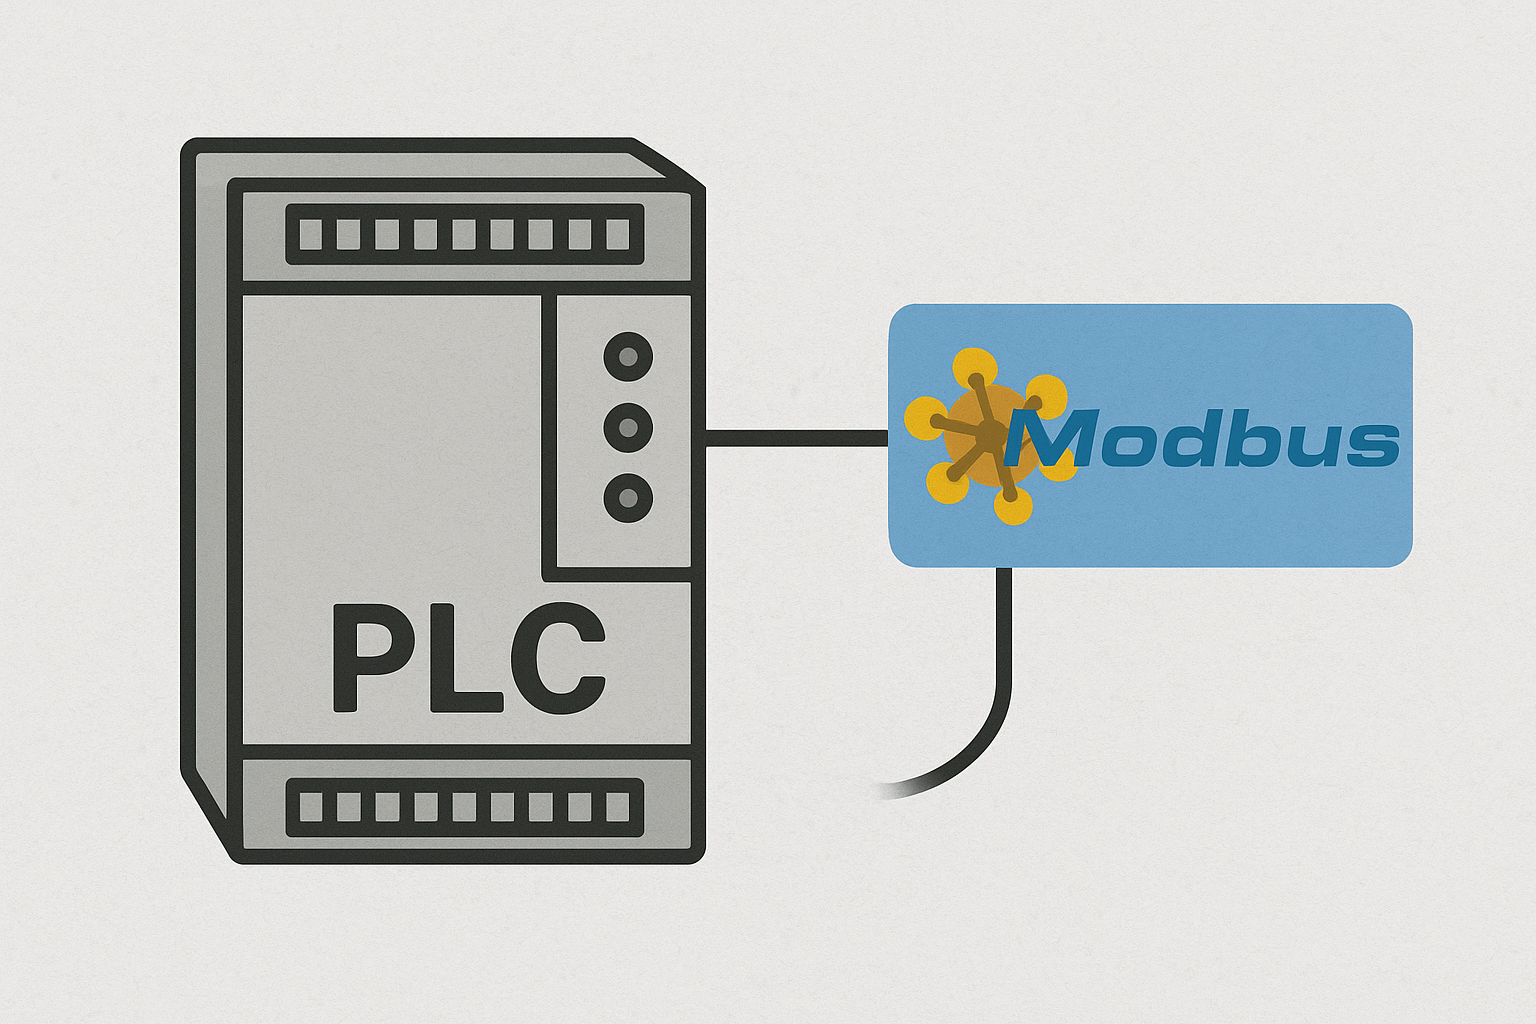
🧠 What is Modbus, and What Are Coils?
Modbus is one of the most widely used protocols in industrial environments. It allows communication between a client (such as a laptop or SCADA system) and field devices like PLCs.
A coil in Modbus is a single-bit data point, representing an ON/OFF (1/0) state. Think of it like a digital switch:
1= ON (e.g., a pump running)0= OFF (e.g., a valve closed)
Each coil has an address, and we can read or write to these addresses using tools like modbus-cli.
⚙️ Setting Up LabShock with Docker
First, make sure you have Docker installed on your machine.
- Clone LabShock, build it (see guide) and run it:
git clone https://github.com/zakharb/labshock.git cd labshock docker-compose up -d - Access the penetration testing VM:
- If you’re using Windows, open Ubuntu via WSL.
- If you’re on Linux/macOS, use your regular terminal.
ssh pentest@localhost -p 2222 (Note: Password: pentest)
🔨 Installing modbus-cli
Once inside the pentest container, follow these steps:
- Update the system:
sudo apt update (Note: Password: pentest) - Install Ruby:
sudo apt install ruby-full - Install modbus-cli:
gem install modbus-cli(Note: By default, the binary will be placed in:/home/pentest/.local/share/gem/ruby/3.3.0/bin/) - Add it to your PATH:
echo 'export PATH="$HOME/.local/share/gem/ruby/3.3.0/bin:$PATH"' >> ~/.bashrc source ~/.bashrc
📡 Connecting to the PLC (IP: 192.168.2.10)
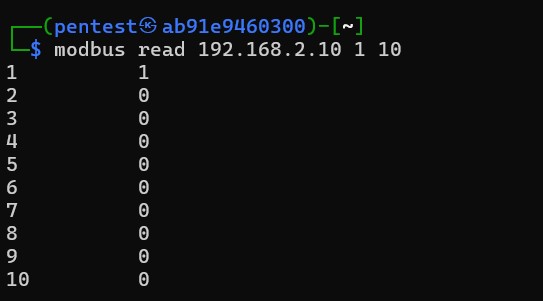
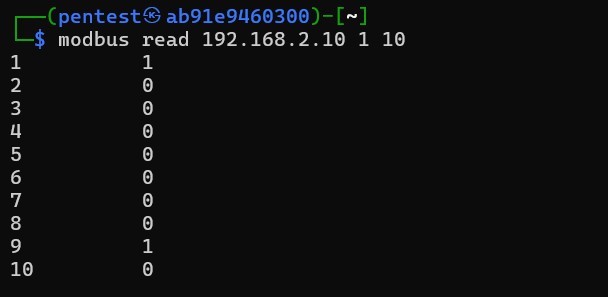
✅ Read Coil Values
We’ll read coils starting from address 1 to 10:
modbus read 192.168.2.10 1 10
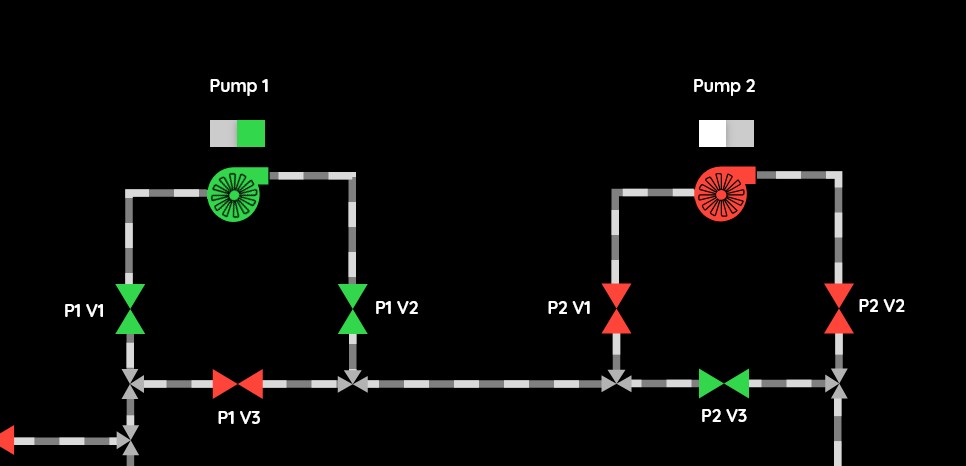
- Coil 1 = true, which represents Pump 1.
- If you visualize this in the GUI, it shows as green (ON).
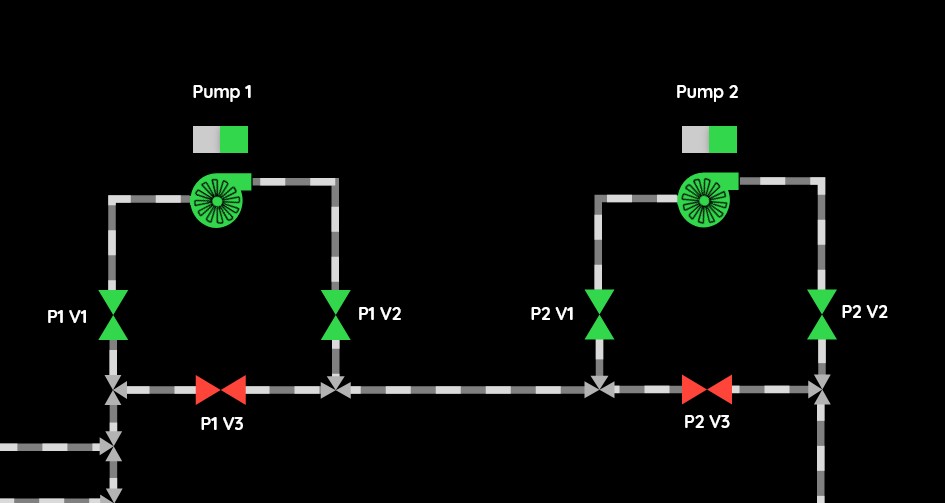
🔄 Write to a Coil (Turn ON Pump 2)
Let’s turn ON Pump 2, which is located at coil 8. Since modbus-cli uses zero-based addressing, we write to address 9:
modbus write 192.168.2.10 9 1
This sets Pump 2 to ON (1).
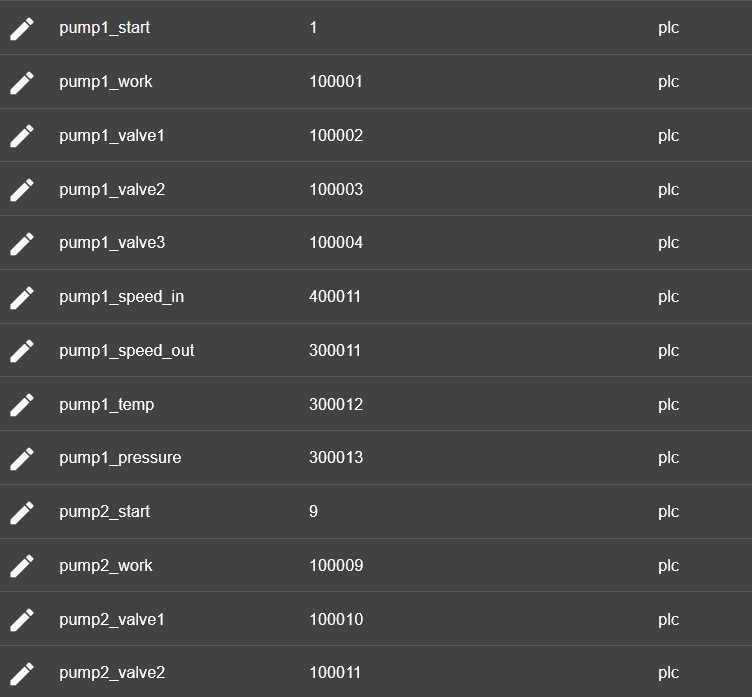
You can find the exact coil and register addresses by visiting the SCADA Portal inside LabShock:
Navigate to SCADA Portal → Connections → PLC Device Settings
Here, you’ll see the configured Modbus addresses for coils and registers used by the simulated PLC. As you can see , pump1’s addrees is 1 and pump2’s address is 9.
🧪 Conclusion
In this tutorial, we:
- Spun up LabShock using Docker
- Connected to the pentest VM via SSH
- Installed and configured
modbus-cli - Read and wrote Modbus coil values to a PLC at
192.168.2.10
Next time, we’ll explore reading holding registers, writing multiple values, and combining CLI tools in larger assessments.
Until then, happy hacking — the industrial way 🔐⚙️